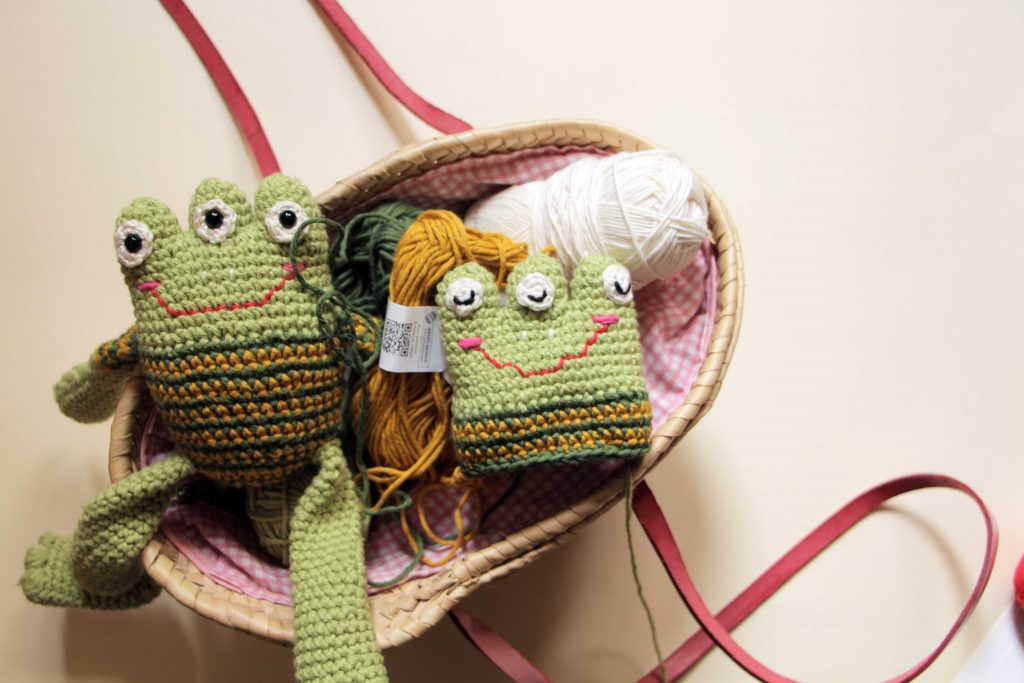
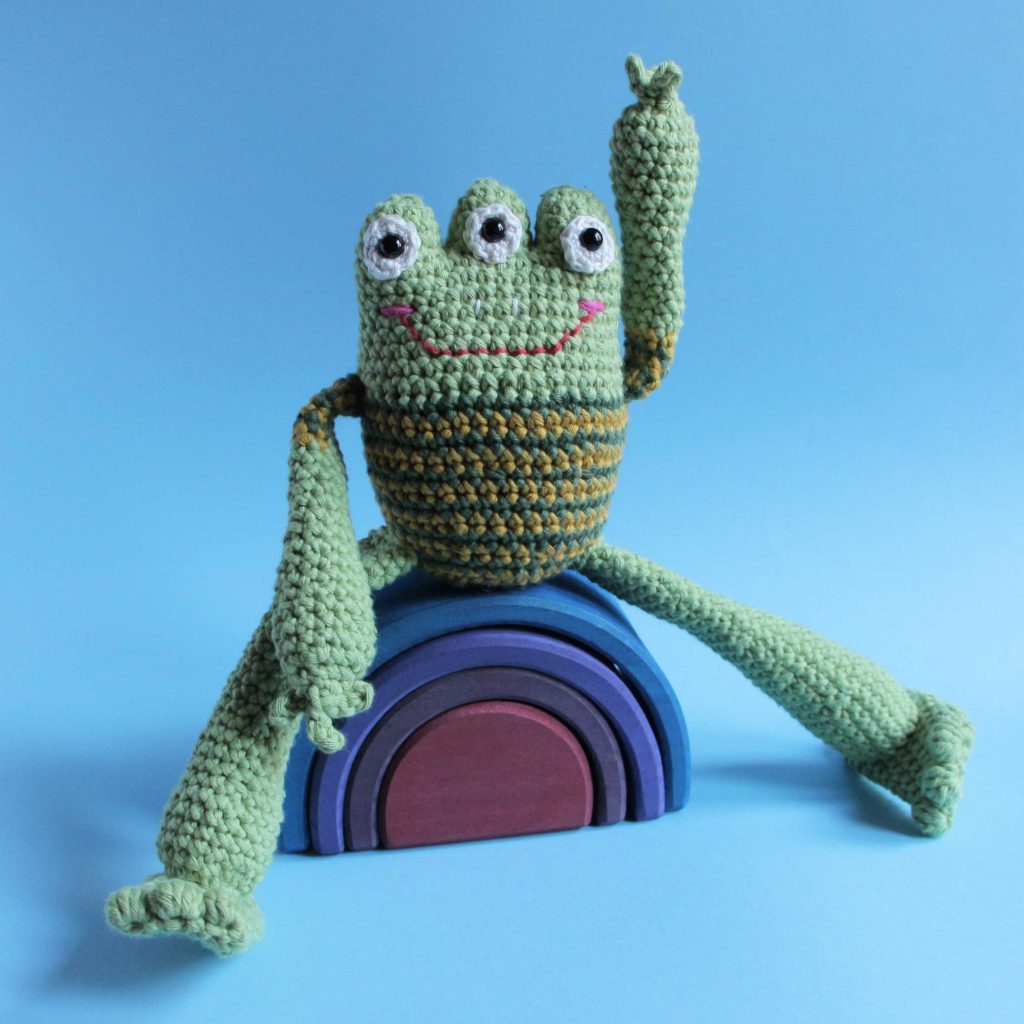
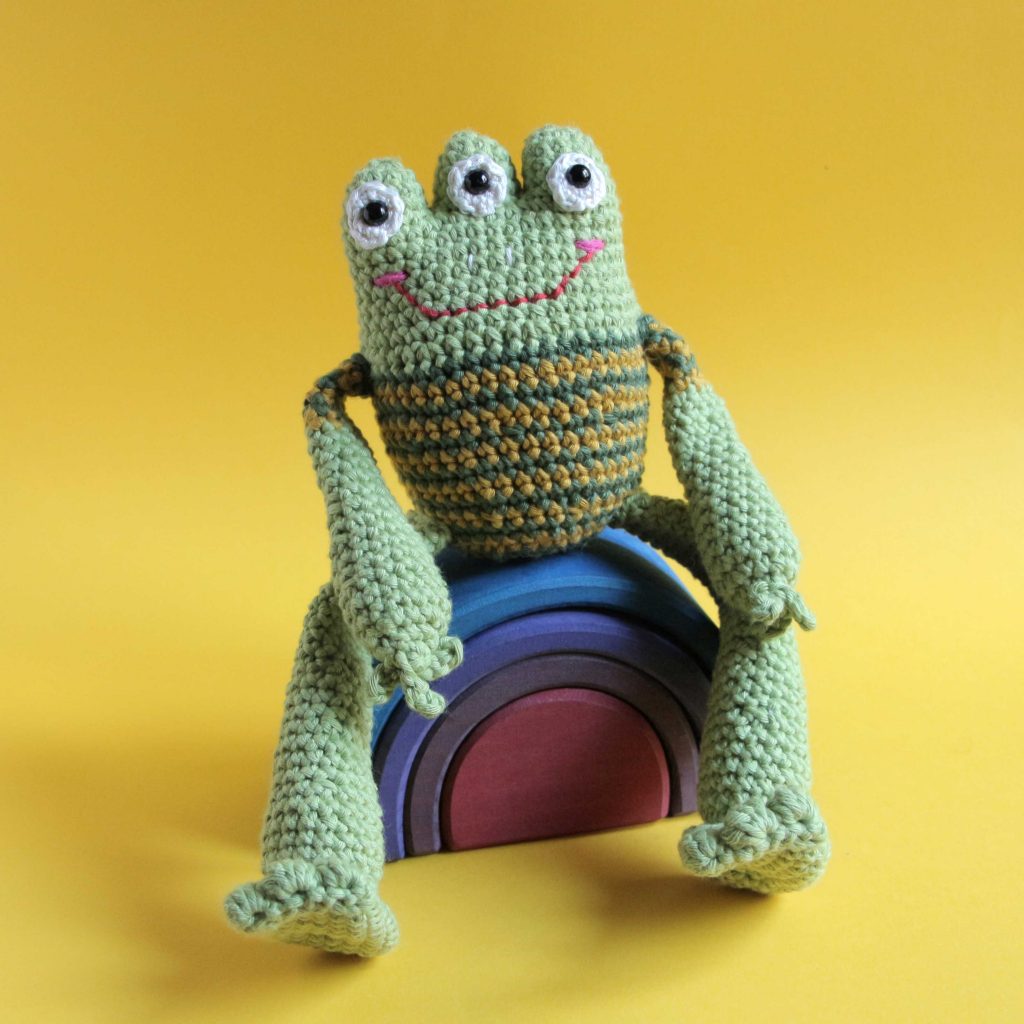
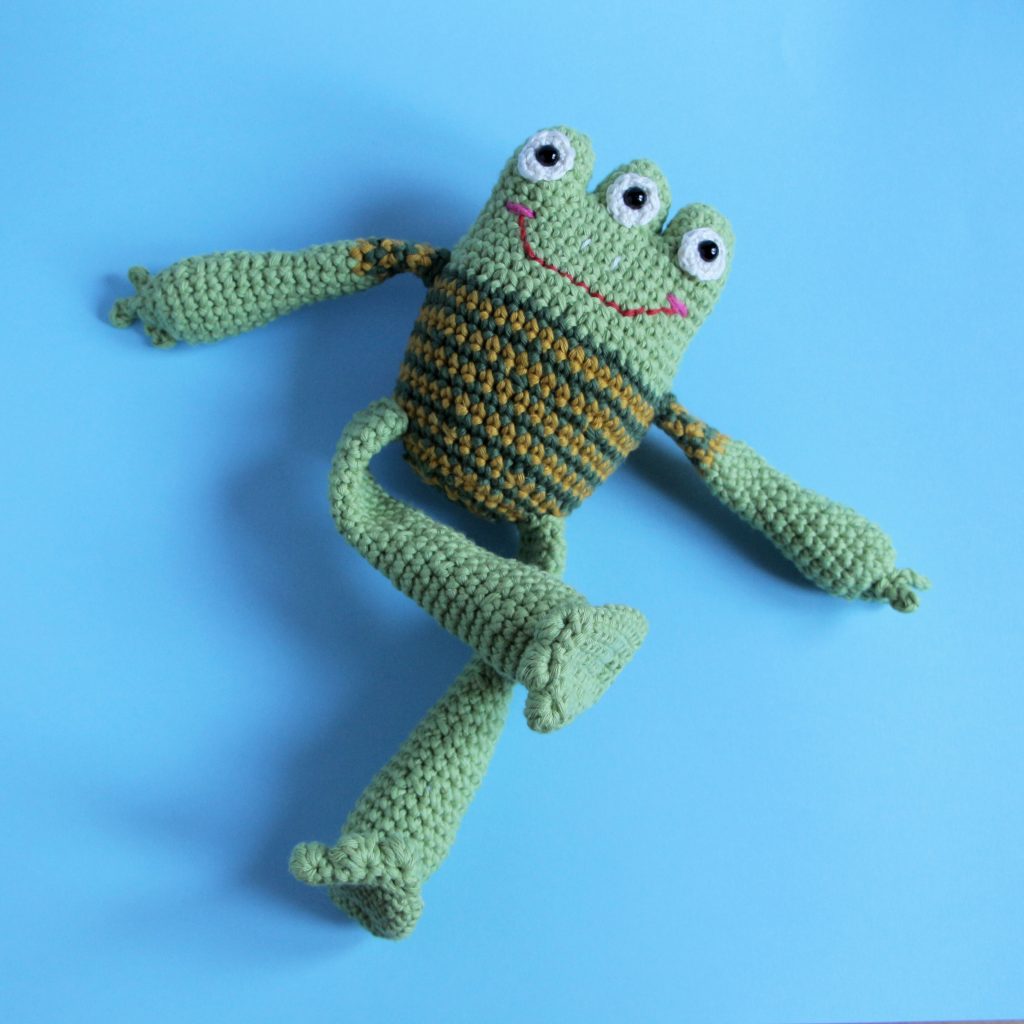
«3 eyes frog» is a character of the author and illustrator of children’s books Olga de Dios.
If you do not know her, I encourage you to visit her website http://olgadedios.es where you can find her beautiful and funny books.
In the author’s own words: My work focuses on the transmission of values of solidarity and the dissemination of some issues on which I believe we should generate more references for childhood.
The sexual affective diversity and other diversities, the gender equality and the acceptance of identities different from the normative ones, the respect to the environment, the promotion of a responsible consumption, the transmission of free culture are some of the issues that concern me and which I work on.
MATERIALS:
●100% cotton yarn, pistachio green, dark green, mustard, off-white, red, black and pink.
● Crochet according to the thickness of the yarn used. In this pattern I used a crochet 4mm crochet body and 2.5mm for eye circles.
● Black safety eyes (I used some 8 mm, if you do embroidery you do not need this!)
● Toy stuffing
● Yarn needle
●Scissors, sewing pins and stitch markers (if you do not have a thread, a hairpin, a safety pin, etc.).
ABBREVIATIONS:
● Mr – Magic ring.
● Sc – Single crochet.
● Ch – Chain
● St / sts – Stitch / stitches
● Sl st – Slip stich
● Inc – Single crochet increase (2sc in one st)
● Inv dec – Invisible single crochet decrease (sc 2 together, front loops only)
● Rnd – Round
● Pop corn stich – PC
● [nº] – The number inside the brackets are the total stitches of the round. Ex: [12], in total, at the end of the round, there must be 12 stitches.
● (…) xN: Repeat the instructions between the parentheses N times. Ex .: (1sc, 1inv st) x6, means that we should weave 1sc, 1inv dec 6 times.
We start!
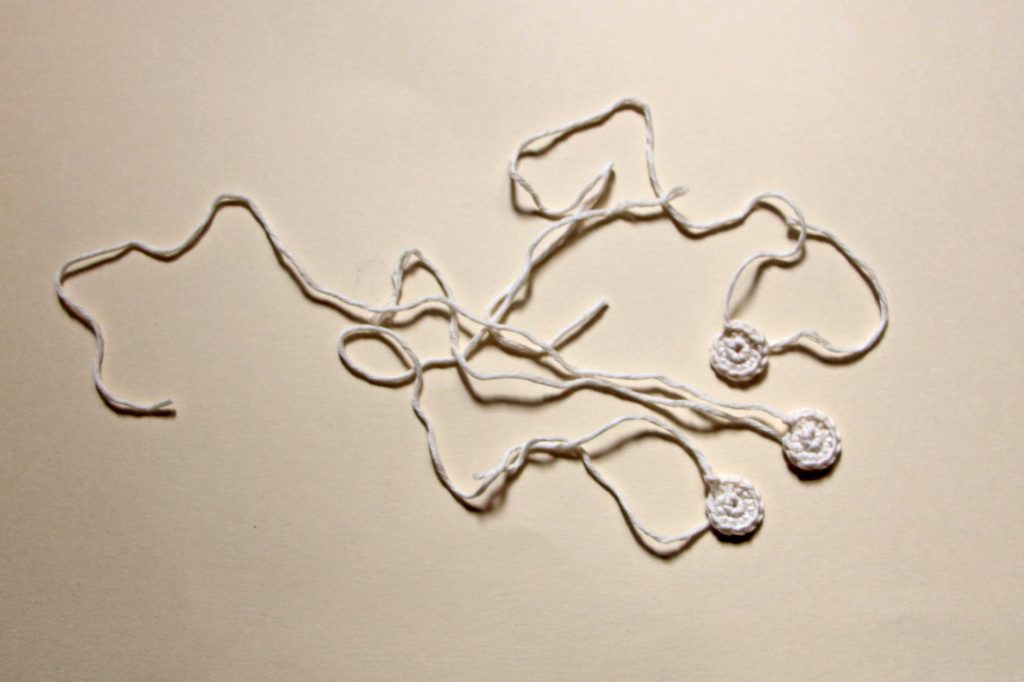
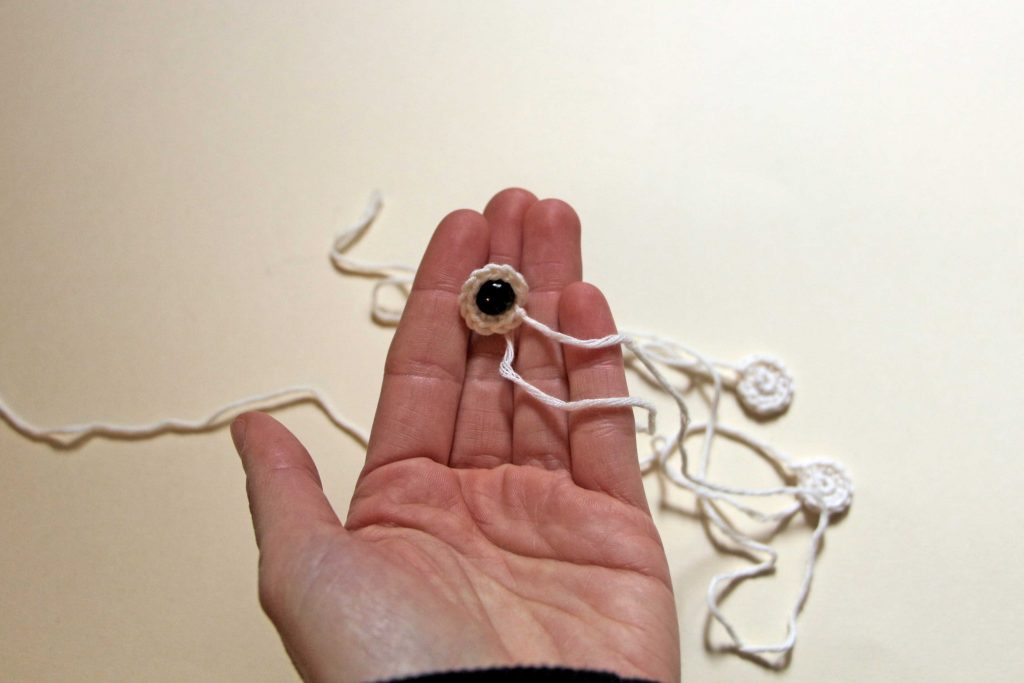
EYES CIRCLE (x3):
Start with off- white and 2.5 crochet
Rnd 1: Work 6 sc in mr [6]
Rnd 2: (inc) x6 [12]
In the end do a sl st, fasten off and leave a long yarn tail for sewing.
HEAD AND BODY:
Start with pistachio green yarn and 4 crochet
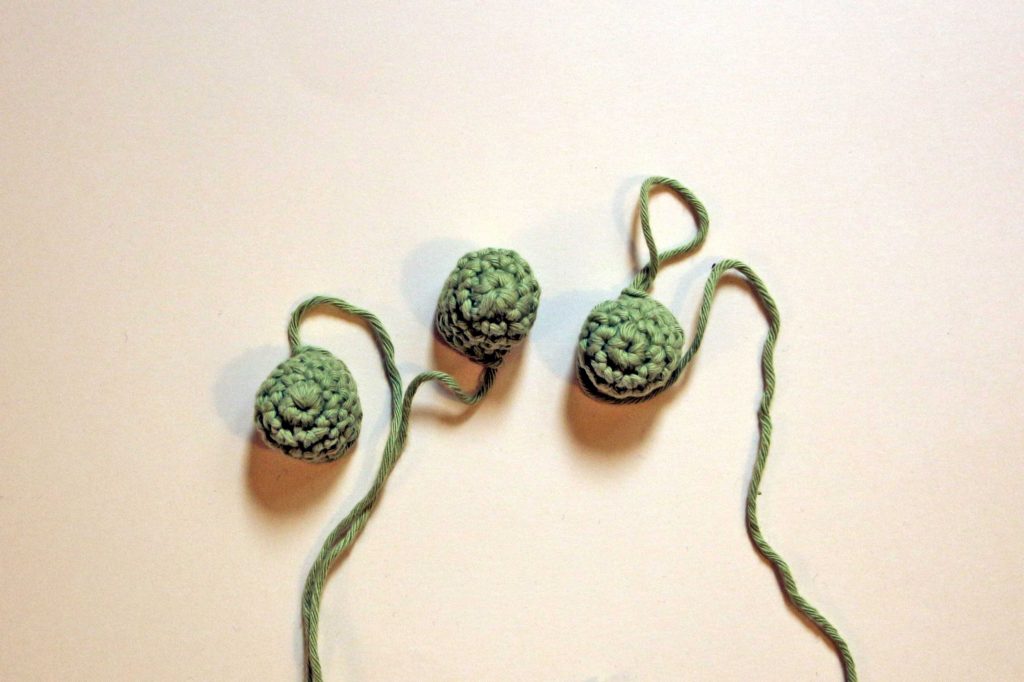
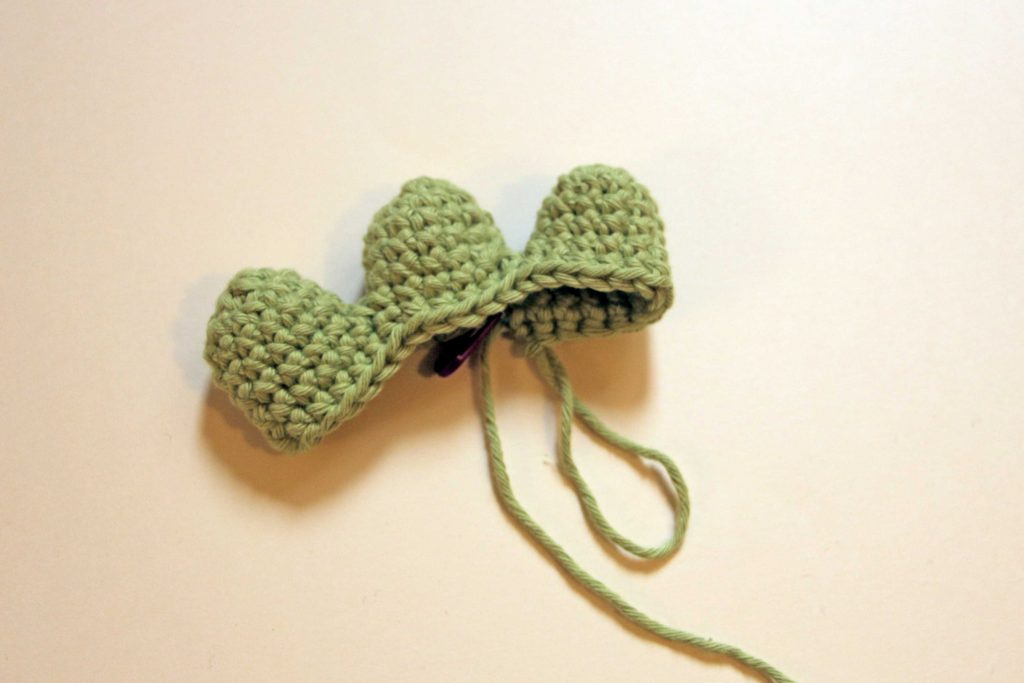
We will start at the base of the eyes (x3).
Rnd 1: Work 6 sc in mr [6]
Rnd 2: (inc) x6 [12]
Rnd 3-5: 12sc (3 rounds)
–Make 2, fasten off and reserve– The 3rd eye we do not have to fasten off because we will join the other two eyes and continue crocheting.
Rnd 6: When we finish the 3rd eye we join with a 2nd eye with a sl st, we make 6sc (mark the first st with the marker, that will be our start of rounds). We join with the 1st eye with a sl st, and we continue crocheting all around 30sc [In total we would have to have 36 sts at the end of the round].
Rnd 7-12: 36sc (6 rounds)
-If we are going to use safety eyes we have to put them now. We put the eye in the middle of the white circle and then place it in each eye bulge centered between rounds 4 and 5. Then in the assembly we will finish sewing- (In the photos you will see that I took advantage to place the embroidered eyes, embroider mouth and cheeks, but it can be done at the end).
Rnd 13: (5sc, 1inc) x6 [42]
At the end of the round, continue crocheting sc until you reach the side of the frog (so the changes back will be less noticeable to be camouflaged under the arm). The first stitch we make in dark green yarn will be marked as our new start of rounds.
Change to dark green color (we start the pattern with stripes: one turn with dark green yarn and another one mustard color yarn, and so on).
Rnd 14-17: 42sc (4 rounds)
Rnd 18: (5sc, 1inv dec) x6 [36]
Rnd 19-22: 36sc (4 rounds)
Rnd 23: (4sc, 1inv dec) x6 [30]
Rnd 24: 30sc
Rnd 25: (3sc, 1inv dec) x 6 [24]
Rnd 26: (2sc, 1inv dec) x6 [18]
Stuff.
Rnd 27: (1sc, 1inv dec) x6 [12]
Rnd 28: 6 inv dec [6]
Fasten off.
ARMS (x2):
Start with pistachio green yarn
Rnd 1: Work 6 sc in mr [6]
Rnd 2: (1inc) x6 [12]
Rnd 3: (5sc, 1inc) x2 [14]
Rnd 4-5: 14sc (3 rounds)
Rnd 6: (5sc, 1inv dec) x2 [12]
Rnd 7-8: 12sc (3 rounds)
Rnd 9: (4sc, 1inv dec) x2 [10]
Rnd 10: 10sc
Rnd 11: (3sc, 1inv dec) x2 [8]
Stuff (the arm rest does not bear stuffing).
Rnd 12-16: 8sc (5 rounds)
Change color (We start with the same striped pattern of the body, starting and ending in dark green yarn).
Rnd 17-23: 8sc (6 rounds)
Rnd 24: 7sc, 1pr
Fasten off and leave a long yarn tail for sewing.
FINGERS (x2):
With pistachio green yarn
Rnd 1: 4ch
Rnd 2: Rotate and make 3 sl st (starting with the 2nd ch)
Rnd 3: 4 ch
Rnd 4: 3 sl st
Rnd 5: 4 ch
Rnd 6: 3 sl st
Fasten off and leave a long yarn tail for sewing (I have left one thread at the beginning and another at the end, and I sew the 2 to the arm so that it is firmer).
FOOTS (x2):
With in pistachio green yarn
Work 8ch (we crocheting all around)
Rnd 1: Crocheting around starting at 2nd st (marking this as the start of rounds) [14]
Rnd 2: (1sc, 1PC) x3, 8sc [14]
Rnd 3-11: 14 sc (9 rounds)
Rnd 12: (1sc, 1inv dec) x4, 1sc [8]
Rnd 13: 4 inv dec, 1pr
Fasten off.
LEGS (x2):
We start with pistachio green yarn
*We left a long thread at the beginning of the mr to sew the foot.
Rnd 1: Work 6 sc in mr [6]
Rnd 2: (1inc) x6 [12]
Rnd 3: (1sc, 1inc) x6 [18]
Rnd 4-7: 18sc (4 rounds)
Rnd 8: (7sc, 1inv dec) x2 [16]
Rnd 9-11: 16sc (3 rounds)
Rnd 12: (6sc, 1inv dec) x2 [14]
Rnd 13-15: 14sc (3 rounds)
Rnd 16: (5sc, 1inv dec) [12]
Stuff (the rest of the leg does not have a stuff)
Rnd 17-24: 12sc (8 rounds)
–Here we can change to dark green or make pistachio green until the end–
Rnd 24-29: 12sc (6 rounds)
Fasten off and leave a long yarn tail for sewing.
If you use safety eyes 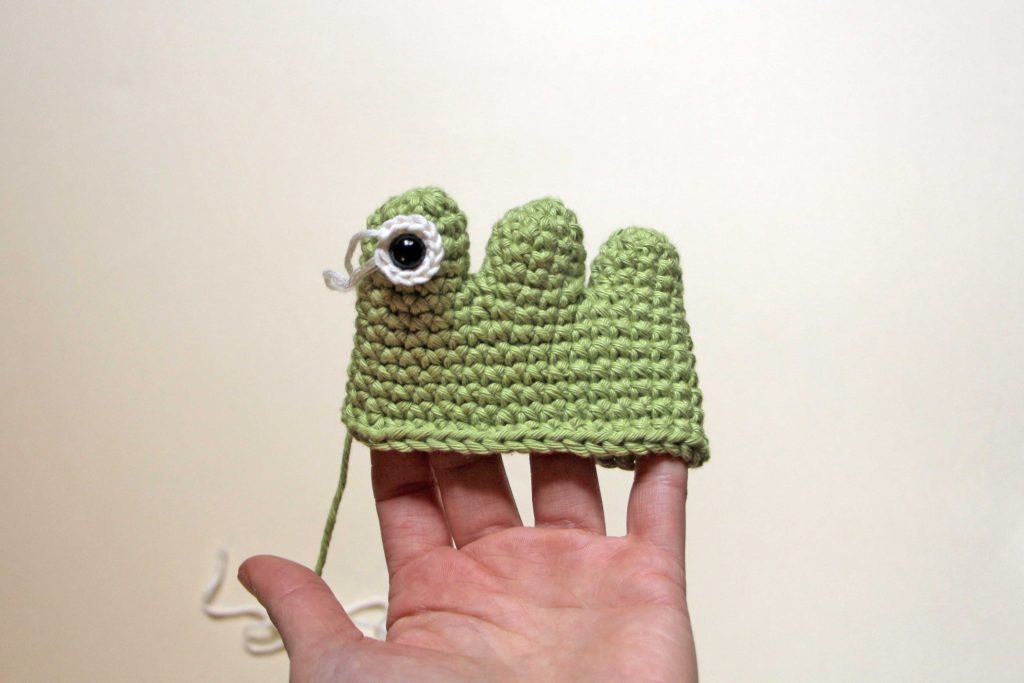
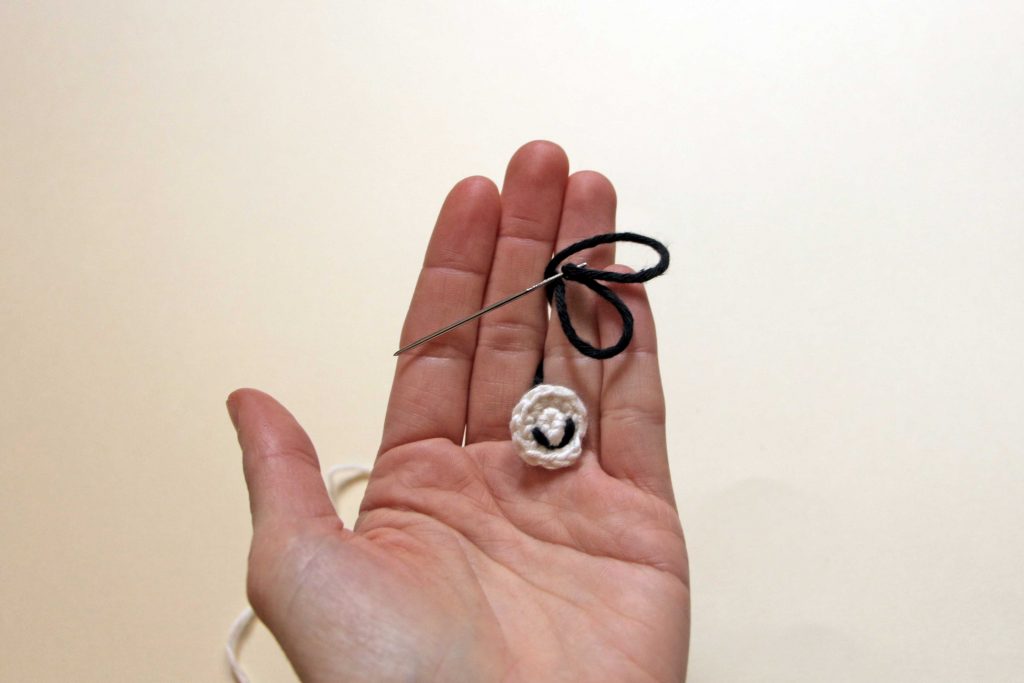
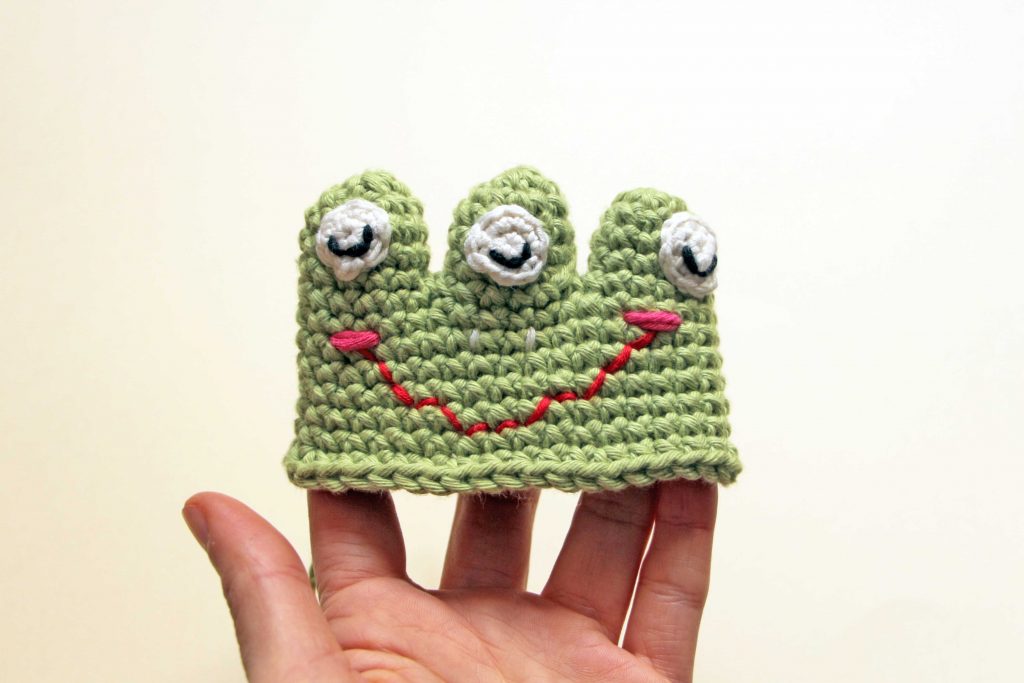
If you make the eyes embroidered 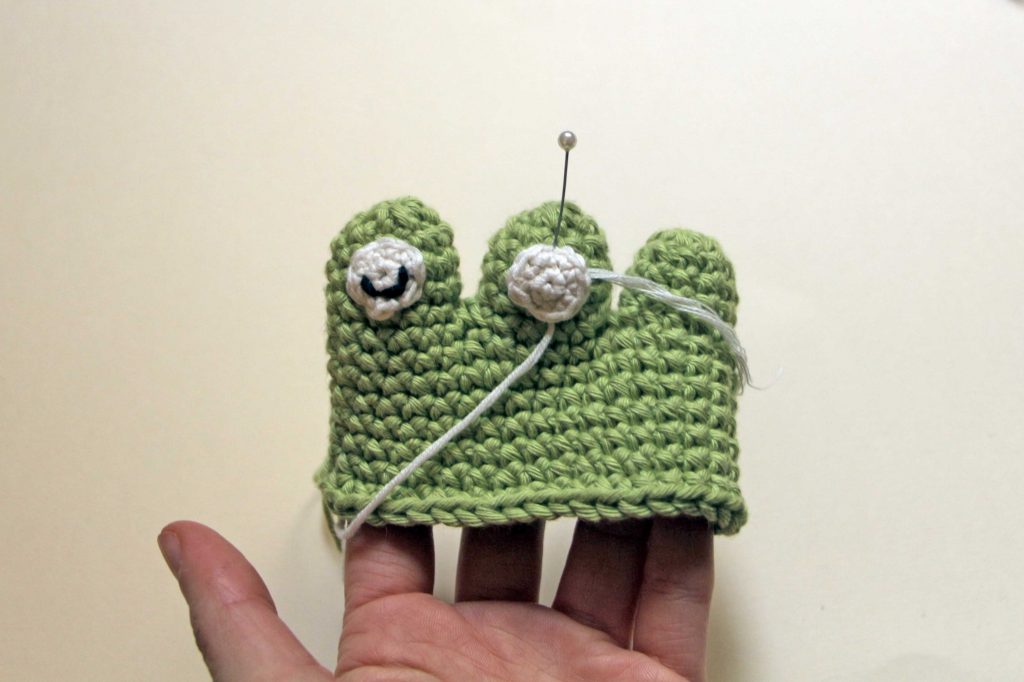
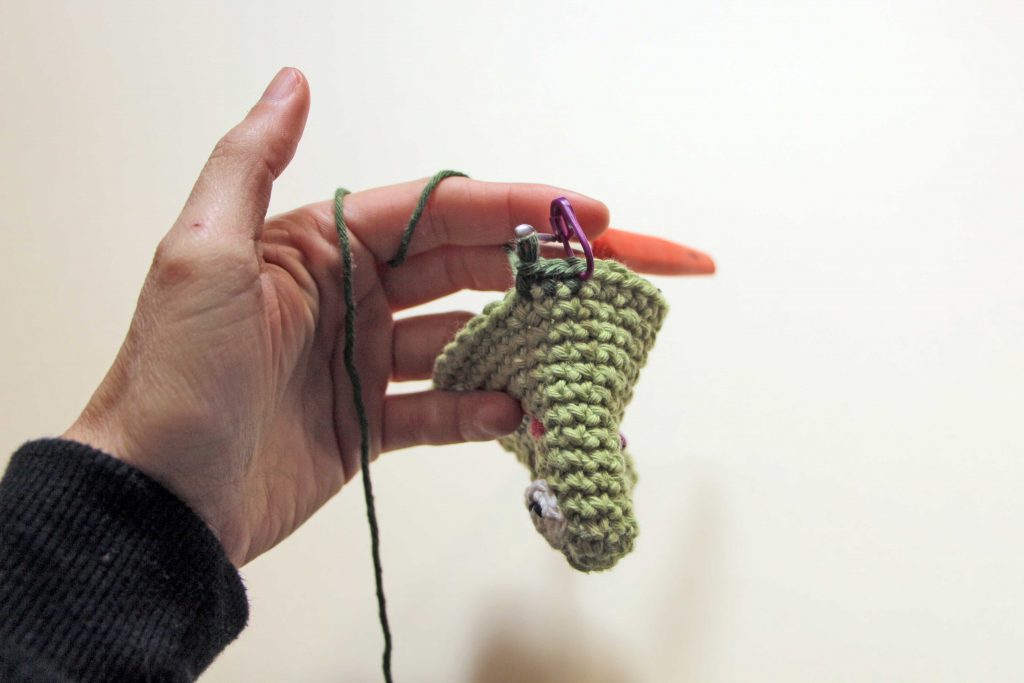
ASSEMBLY:
1- Sew the fingers to the hands. Place them centered just above the first round (between rounds 1 and 2), fasten with pins and sew.
2- Sew the foots to the legs. Center the base of the legs on the foots between rounds 7 and 10, fasten with pins and sew.
3- Sew the arms. Place the arm on the side between rounds 14 and 15 (with the fingers on top) fasten and sew. (Repeat the same operation on the other side with the second arm).
4- Sew the legs. Place the leg to one side, in line with the arm, between rounds 23 and 24 and sew (repeat the operation with the second leg).
5- Face: Sew the eyes to the face if we already have them with safety eyes.
*If we are going to make the eyes embroidered, we embroider them with black thread giving 3 stitches around the first round of the white circle. Then we place them, hold them and sew them to the face.
6- We embroider with white thread the 2 holes of the nose, with red a smile, with pink some cheeks.
Congratulations! You already have it!
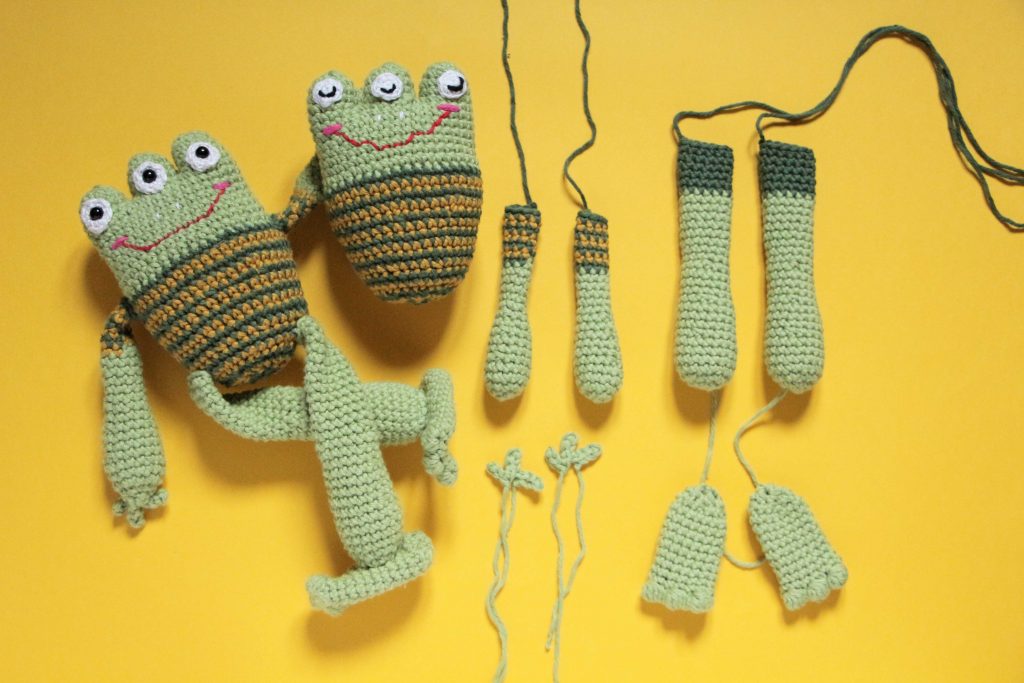
I HOPE YOU HAVE ENJOYED DOING A FROG OF 3 EYES.
I WOULD LOVE TO SEE YOUR FROGS! TAG ME ON INSTAGRAM 😉
@kurumitoys #kurumipattern
THIS IS AN ORIGINAL PATTERN OF KURUMI. THE PATTERN IS FOR PERSONAL AND NON-COMMERCIAL USE. THE PATTERN CAN NOT BE REPRODUCED WITHOUT THE AUTHOR’S PERMISSION. THIS PATTERN CAN NOT BE SOLD.
IF YOU HAVE ANY DOUBT OR SUGGESTION, WRITE TO MAIL
jacintakurumi@gmail.com
THANK YOU FOR RESPECTING MY WORK!
IF YOU WANT TO SUPPORT MY WORK SO I CAN KEEP CREATING FREE CONTENT YOU CAN INVITE ME TO A COFFEE BY CLICKING ON THIS LINK:
Thank you very much…… Greetings and happy crocheting! ♥♥♥♥♥♥


![ANTU, el pequeño sol [patrón crochet]](https://kurumiweb.net/wp-content/uploads/2020/06/portada_cast-600x400.jpg)
![Bunny – pumpkin [free amigurumi pattern]](https://kurumiweb.net/wp-content/uploads/2019/01/pattern_bunny.jpg)
