Hello everybody!
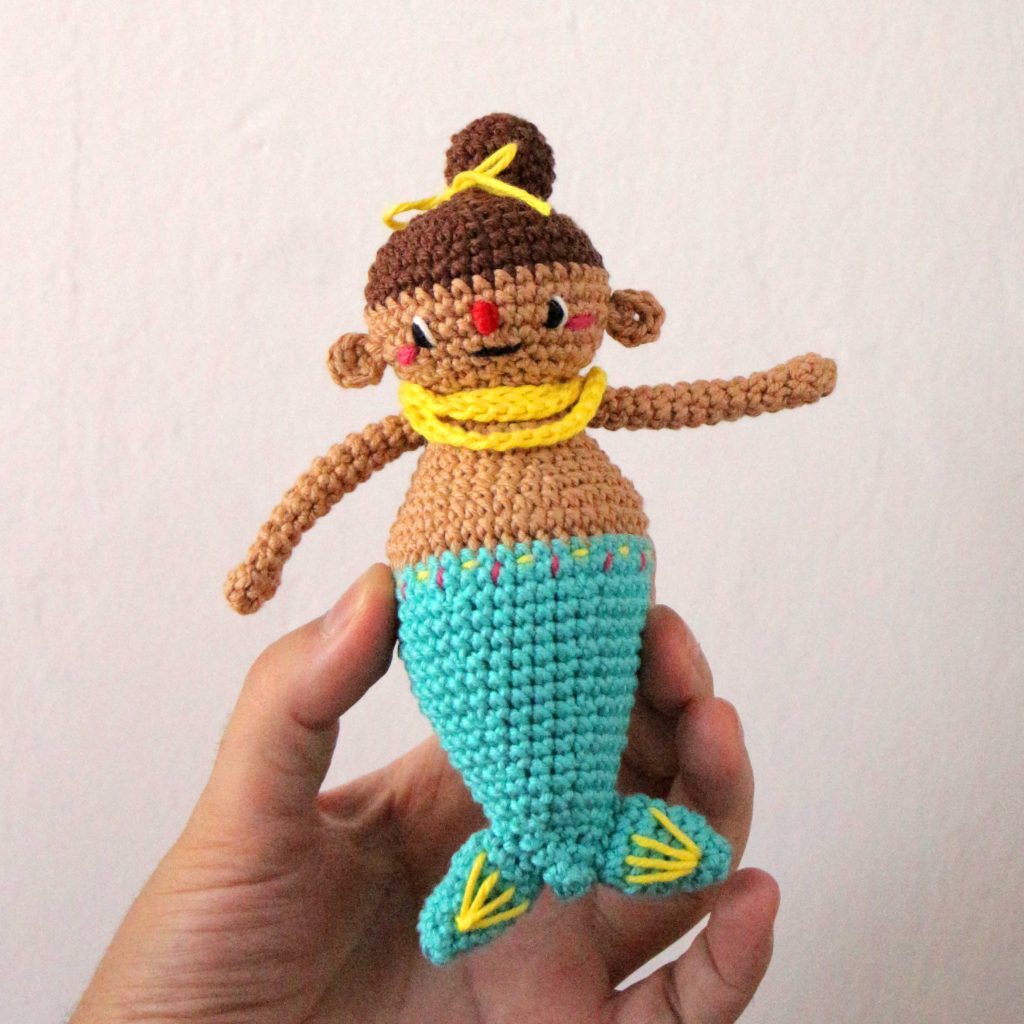
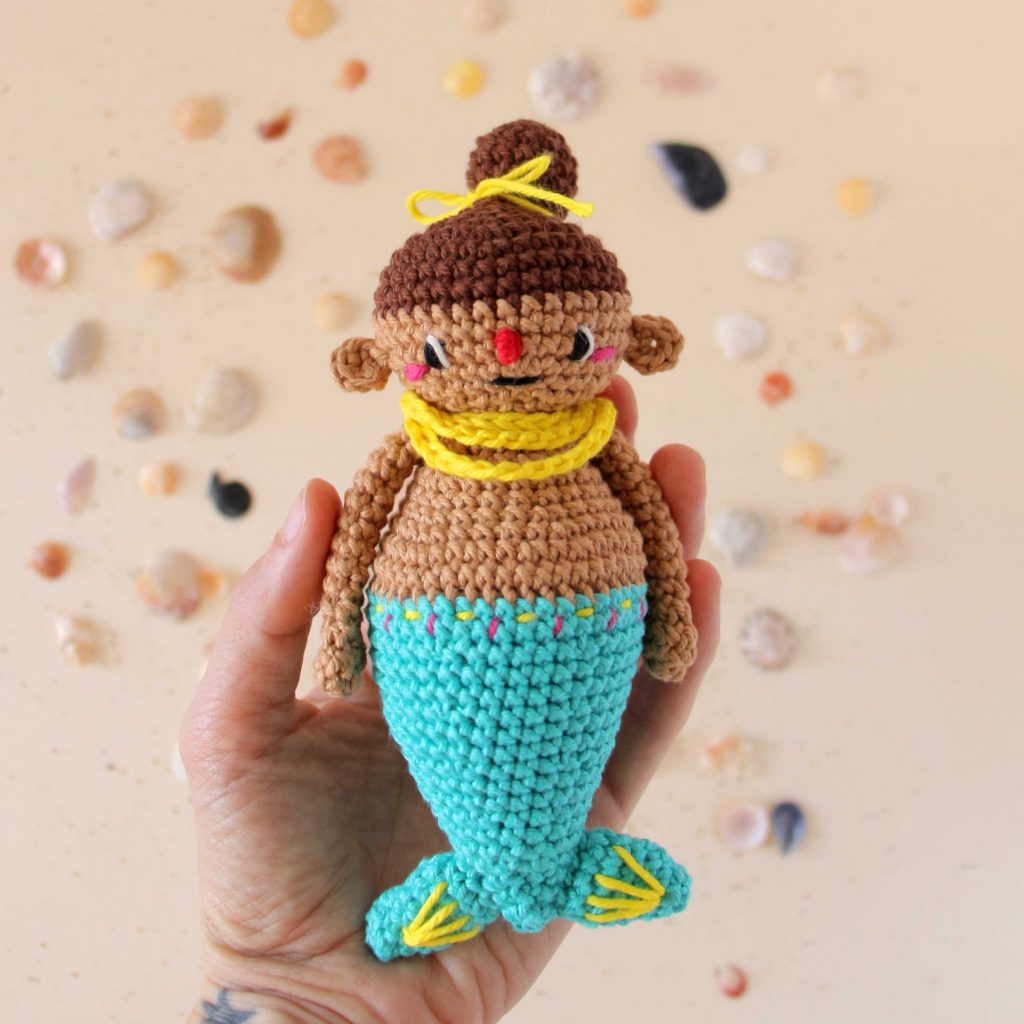
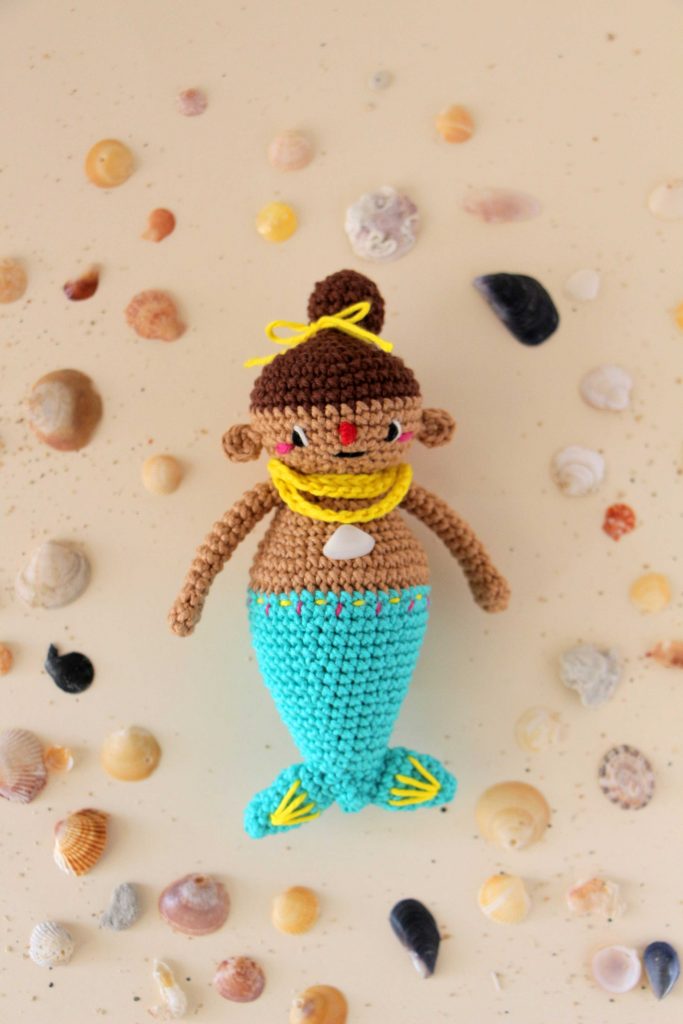
Here is a small tutorial, step by step, so you can make Kala the mermaid with your own hands.
This pattern of amigurumi is quite simple, you can customize it in many ways: changing the color, embroidering the tail, changing the expression of the face …
I hope you enjoy it! And don’t forget to tag me on instagram to see your mermaids !!
@kurumitoys #kurumipattern
A hug!
Materials:
● 100% Cotton yarn (I used Dmc happy cotton for this project): Brown, beige, turquoise. For the necklace and embroidery I used traces of color yellow, pink, white, black and red.
● Crochet hook according to the thickness of the yarn used. In this pattern I used a 2.5 mm crochet.
● Toy stuffing.
● Yarn needle.
● Scissors, sewing pins and stitch markers (if you do not have you can use a thread, a hairpin, a safety pin, etc.).
Abbreviations:
● mr – Magic ring
● sc – Single crochet
● ch – Chain
● st / sts – Stitch / stitches
● sl st – Slip stitch
● inc – Single crochet increase (2sc in one st).
● inv dec – Invisible single crochet decrease (2sc together, front loops only).
● Rnd – Round
● [nº] – The number in the brackets is the total stitches of the round. Ex: [12] means that in total, at the end of the round, there must be 12 stitches.
● (…) xN – Repeat the instructions in the brackets N times. Ex: (1sc, 1inv st) x6, means that we should crochet 1sc, 1inv dec 6 times.
Let’s do it!
HEAD:
Start with dark brown yarn:
Rnd1: 6sc in a mr [6]
Rnd2: 6 inc [12]
Rnd3: (1sc, 1inc) x6 [18]
Rnd4: (2sc, 1inc) x6 [24]
Rnd5: (3sc, 1inc) x6 [30]
Rnd6: (4sc, 1inc) x6 [36]
Rnd7-8: 36 sc (2 rounds)
With beige yarn:
Rnd9-11: 36 sc (3 rounds)
Rnd12: (1 inv dec, 4sc) x6 [30]
Rnd13: (1 inv dec, 3sc) x6 [24]
Rnd14: (1 inv dec, 2sc) x6 [18]
Stuff
Rnd15: (1 inv dec, 1sc) x6 [12]
Rnd16: 6 inv dec [6]
Close off*
(*in order to close off, pass the needle through each point, only grabbing the front loop, from the outside towards the inside, making your way completely around. Pull hard and fasten off).
HAIR BUN:
With dark brown yarn:
Rnd1: 5sc in a mr [5]
Rnd2: 5 inc [10]
Rnd3: (1sc, 1inc) x5 [15]
Rnd4-6: 15sc (3 rounds)
Rnd7: (1 inv dec, 1sc) x5 [10]
Make a sl st and fasten off leaving a long thread to sew it onto the head.
BODY AND TAIL:
Start with beige yarn:
Make 18 ch (leave a long thread at the beginning to sew to the head).
Join with a sl st and continue crocheting:
Rnd1-2: 18 sc (2 rounds)
Rnd3: (2sc, 1inc) x6 [24]
Rnd4-5: 24 sc (2 rounds)
Rnd6: (3sc, 1inc) x6 [30]
Rnd7: (4sc, 1inc) x6 [36]
Rnd8: 12sc, (1sc, 1inc) x6, 12sc [42]
Rnd9: 42sc
Change to turquoise yarn
Rnd10: 42sc (crochet only by the front loop)
Rnd11: 42sc
Rnd12: (1 inv dec, 5sc) x6 [36]
Rnd13-14 36sc (2 rounds)
Rnd15: (1 inv dec, 4sc) x6 [30]
Rnd16-17: 30sc (2 rounds)
Rnd18: (1 inv dec, 3sc) x6 [24]
Rnd19-20: 24sc (2 rounds)
Rnd21: (1 inv dec, 2sc) x6 [18]
Rnd22-23: 18sc (2 rounds)
Rnd24: (1 inv dec, 1sc) x6 [12]
Rnd25: (1 inv dec, 4sc) x2 [10]
Rnd26: (1 inv dec, 3sc) x2 [8]
Rnd27: (1 inv dec, 2sc) x2 [6]
Close off.
Stuff firmly.
FINS (X2):
With turquoise yarn
Rnd1: 5sc in a mr [5]
Rnd2: 5 sc
Rnd3: 1 inc, 4sc [6]
Rnd4: 1 inc, 5sc [7]
Rnd5: 1 inc, 6sc [8]
Rnd6: 1 inc, 7sc [9]
Rnd7: 1 inc, 8sc [10]
Rnd8: (1 inv dec, 3sc) x2 [8]
Make a sl st and fasten off leaving a long thread to sew it onto the tail.
EARS (X2):
With beige yarn:
Rnd1: 6sc in a mr [6]
Join with a sl st and fasten off leaving a long thread to sew it onto the face.
ARMS (X2):
With beige yarn:
Rnd1: am de 5 sc
Rnd2: 5 inc [10]
Rnd3: (1 inv dec, 3sc) x2 [8]
Rnd4: (1 inv dec, 2sc) x2 [6]
Rnd5-14: 6sc (10 rounds)
Make a sl st and fasten off leaving a long thread to sew it onto the body.
NECKLACE:
Make 74 ch and join with a sl st.
Fasten off.

ASSEMBLY:
1- Place the head on the body, using pins, and sew.
2- Place the bun on the head, using pins, and sew.
3- Embroider the eyes, nose, mouth and cheeks, on the face.
4- Place the ears, on the sides of the face (using pins), and sew.
5- Place the arms, on the sides of the body (using pins), in line with the ears, and sew.
6- Place the fins, on the sides on the tip of the tail (using pins), and sew.
7- Embroider the tail.
8- Put the necklace on the neck and put a bow on the bun using remains of yarn.
Congratulations! You already have it!
IF YOU WANT TO SUPPORT MY WORK SO I CAN KEEP CREATING FREE CONTENT YOU CAN INVITE ME TO A COFFEE BY CLICKING ON THIS LINK:
I HOPE YOU HAVE ENJOYED MAKING KALAI WOULD LOVE TO SEE YOUR GUBA! TAG ME ON INSTAGRAM 😉
THIS IS AN ORIGINAL KURUMI PATTERN. THE PATTERN IS FOR PERSONAL AND NON-COMMERCIAL USE. THE PATTERN CAN NOT BE REPRODUCED WITHOUT THE AUTHOR’S PERMISSION. THIS PATTERN CAN NOT BE SOLD.
IF YOU FIND MISTAKES IN THE PATTERN, IF YOU HAVE ANY DOUBTS OR SUGGESTIONS, PLEASE WRITE TO
jacintakurumi@gmail.com
THANK YOU FOR RESPECTING MY WORK!
Thank you very much…… Greetings and happy crocheting!!




![Амит, добрый кролик [Бесплатный рисунок амигуруми]](https://kurumiweb.net/wp-content/uploads/2019/04/amit_ruso.jpg)
![KALA LA SIRENA [patrón crochet]](https://kurumiweb.net/wp-content/uploads/2019/08/siren_web_001.jpg)

