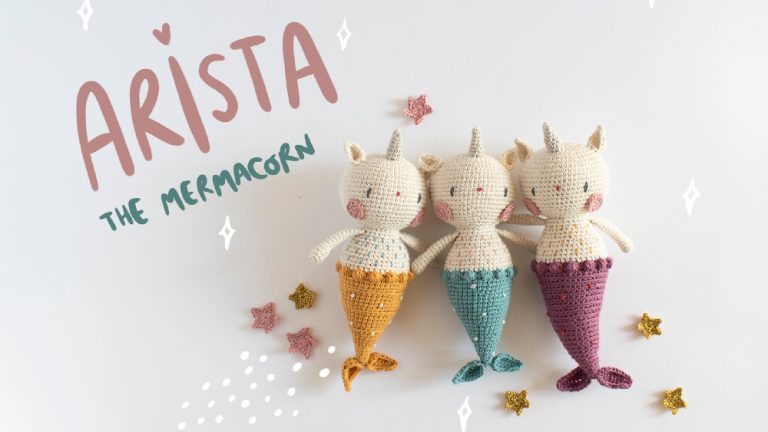
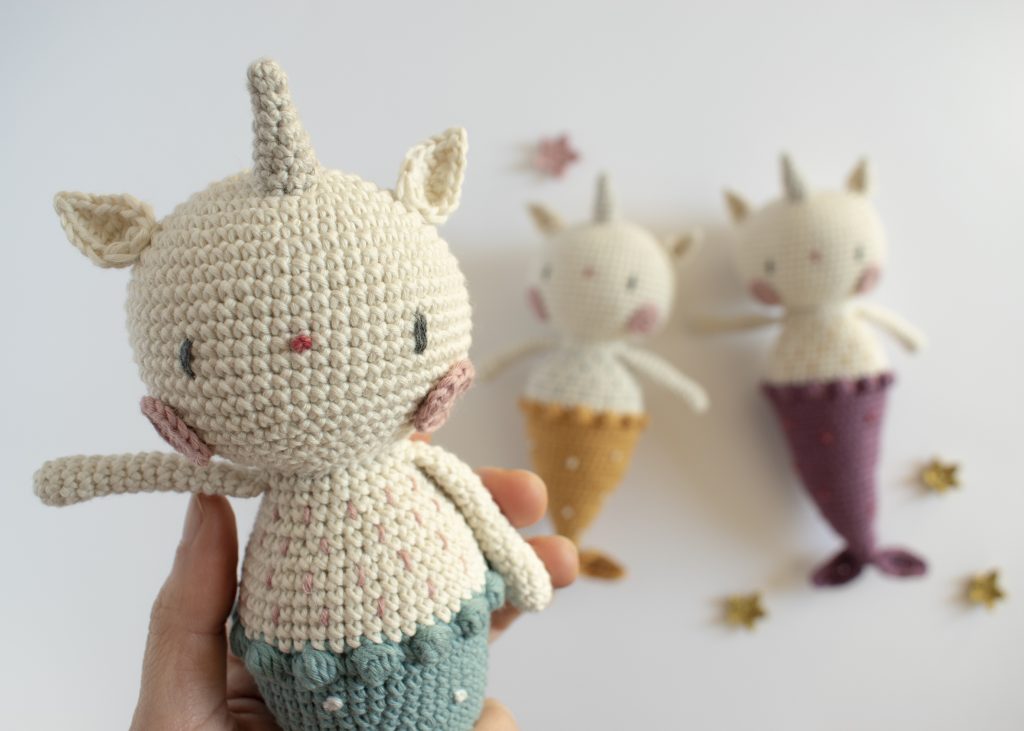
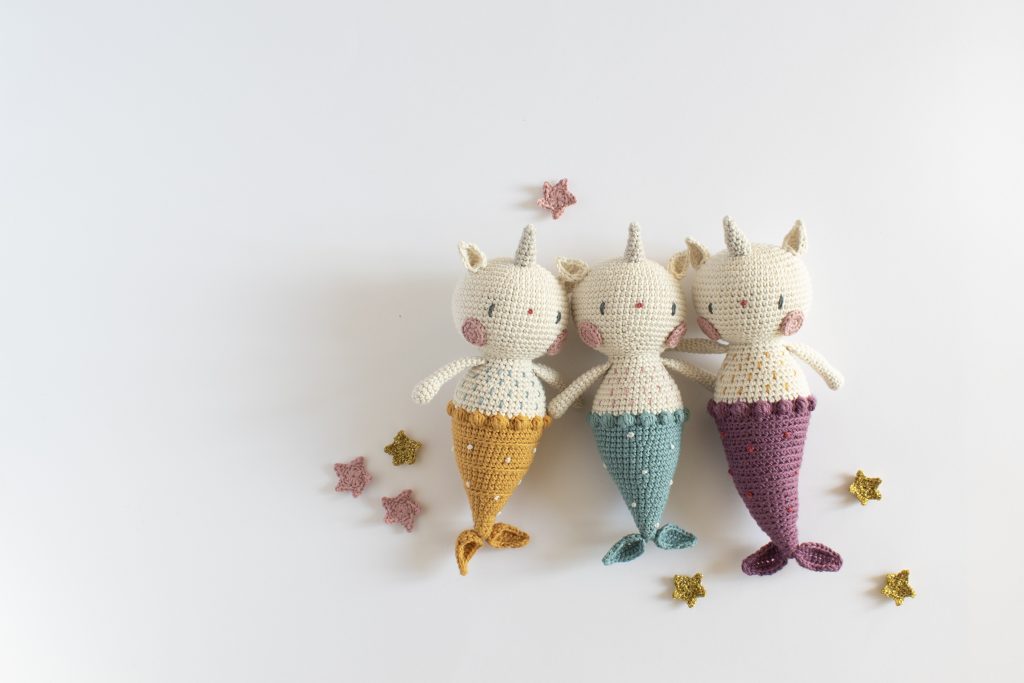
Arista was born from the creativity of my little one on some very cold winter days. My little son asked me to make a Unicorn-mermaid costume for him and then he thought it would be a good idea for him to also make a doll, so I told him that we could design it together and then I would crochet it. He loved the idea and he wanted to choose the name too: Arista.
After a few sketches, crocheting and uncrocheting, and making a few prototypes, I thought it would be a good idea to share this “recipe” with you so that you can make your own Mermacorn. Here you have it, enjoy it!
MATERIALS & TOOLS
● 100% Cotton yarn in colors: off-white for the head, the arms and the body, a color of your choice for the tail and fins (in the pattern I will call it color A) and pink for the cheeks. Scraps of yarn (or embroidery floss) to embroider the eyes, the nose and the details on the body and the tail.
● Crochet hook according to the thickness of the yarn used (I use a 2,25 mm crochet hook)
● Toy stuffing
● Yarn and embroidery needle
● Scissors, sewing pins and stitch markers (You can also use a piece of yarn, a safety pin, or a hairpin)
STITCHES USED (US terms)
● MR – Magic ring
● sc – Single crochet
● ch – Chain stitch
● st / sts – Stitch / stitches
● sl st – Slip stitch
● hdc – Half double crochet
● dc – Double crochet
● tc – Triple crochet
● BS – Bobble stitch
● inc – Single crochet increase (2 sc in one st).
● inv dec – Invisible single crochet decrease (2 sc together, front loops only).
● rnd – Round
● [no.] – The number inside the brackets is the total number of stitches of the round. Ex: [12] means that in total, there must be 12 stitches in the round.
● (…) x N – Repeat the instructions between the brackets N times. Ex: (1 sc, 1 inv st) x 6, means that we should crochet 1 sc, 1 inv dec 6 times.
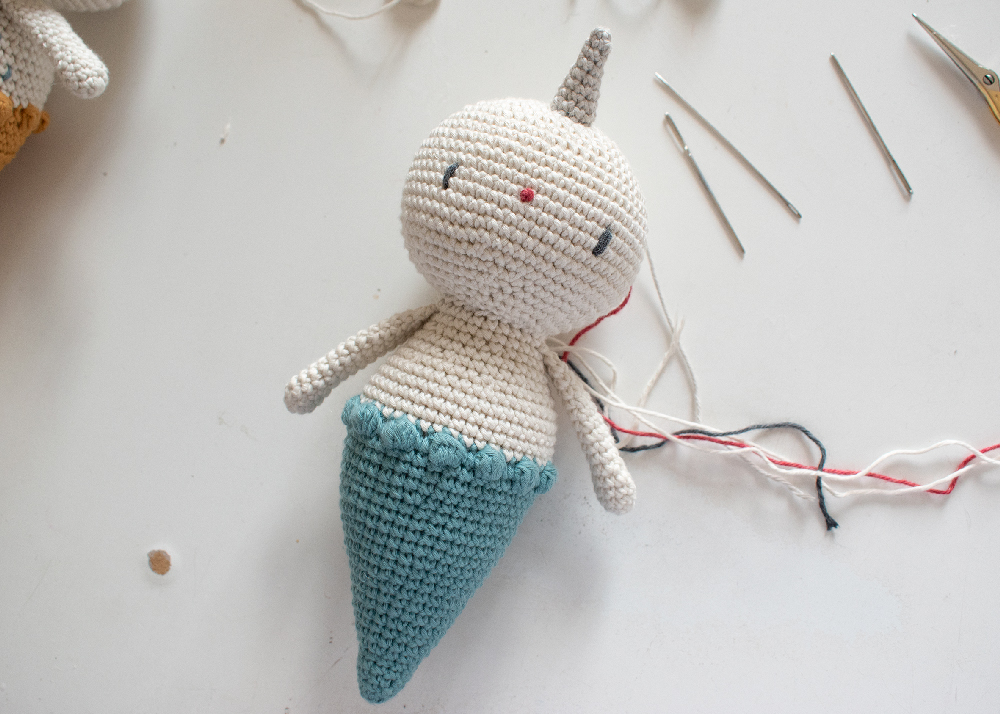
Construction: The head and body/tail are made into separate pieces which are then sewn together to form the main piece. The arms, horn, fins, ears and cheeks are made apart and sewn to the main piece.
Approximate measurements: 20 cms
HEAD
With off-white
Rnd 1: 6 sc in a MR [6]
Rnd 2: 6 inc [12]
Rnd 3: (1 sc, 1 inc) x 6 [18]
Rnd 4: 1 sc, 1 inc, (2 sc, 1 inc) x 5, 1 sc [24]
Rnd 5: (3 sc, 1 inc) x 6 [30]
Rnd 6: 2 sc, 1 inc, (4 sc, 1 inc) x 5, 2 sc [36]
Rnd 7: (5 sc, 1 inc) x 6 [42]
Rnd 8: 3 sc, 1 inc, (6 sc, 1 inc) x 5, 3 sc [48]
Rnd 9: (7 sc, 1 inc) x 6 [54]
Rnd 10: 4 sc, 1 inc, (8 sc, 1 inc) x 5, 4 sc [60]
Rnd 11-19: 60 sc (9 rounds)
Rnd 20: 4 sc, 1 dec, (8 sc, 1 dec) x 5, 4 sc [54]
Rnd 21: (7 sc, 1 dec) x 6 [48]
Rnd 22: 3 sc, 1 dec, (6 sc, 1 dec) x 5, 3 sc [42]
Rnd 23: (5 sc, 1 dec) x 6 [36]
Stuff as you go.
Rnd 24: 2 sc, 1 dec, (4 sc, 1 dec) x 5, 2 sc [30]
Rnd 25: (3 sc, 1 dec) x 6 [24]
Rnd 26: 1 sc, 1 dec, (2 sc, 1 dec) x 5, 1 sc [18]
Rnd 27: (1 sc, 1 dec) x 6 [12]
Before making the last round, check that the head is stuffed firmly.
Rnd 29: 6 dec
Close off.
BODY
Start with color A.
Stuff as you go.
Rnd 1: 8 sc in a MR [8]
Rnd 2-3: 8 sc (2 rounds)
Rnd 4: (1 sc, 1 inc) x 4 [12]
Rnd 5-6: 12 sc (2 rounds)
Rnd 7: (1 sc, 1 inc) x 6 [18]
Rnd 8-9: 18 sc (2 rounds)
Rnd 10: 1 sc, 1 inc, (2 sc, 1 inc) x 5, 1 sc [24]
Rnd 11-12: 24 sc (2 rounds)
Rnd 13: (3 sc, 1 inc) x 6 [30]
Rnd 14-15: 30 sc (2 rounds)
Rnd 16: 2 sc, 1 inc, (4 sc, 1 inc) x 5, 2 sc [36]
Rnd 17-20: 36 sc (4 rounds)
Rnd 21: (5 sc, 1 inc) x 6 [42]
Rnd 22-24: 42 sc (3 rounds)
Rnd 25: (1 BS, 2 sc) x 14 [42]
Change to off-white
Rnd 26-30: 42 sc (5 rounds)
Rnd 31: (5 sc, 1 dec) x 6 [36]
Rnd 32: 2 sc, 1 dec, (4 sc, 1 dec) x 5, 2 sc [30]
Rnd 33: 30 sc
Rnd 34: (3 sc, 1 dec) x 6 [24]
Rnd 35-36: 24 sc (2 rounds)
Make a sl st and fasten off leaving a long tail to sew it to the head.
ARMS (x 2)
With off-white
Rnd 1: 5 sc in a MR [5]
Rnd 2: 5 inc [10]
Rnd 3-5: 10 sc (3 rounds)
Rnd 6: (1 dec, 3 sc) x 2 [8]
Rnd 7-15: 8 sc (9 rounds)
*The arms are not stuffed.
Rnd 16: 1 ch. Fold the top of the arm in half and work 3 sc, 1 sl st through front and back sts [4]
Fasten off leaving a long tail to sew it to the body.
HORN
With light gray
Rnd 1: 4 sc in a MR [4]
Rnd 2: 4 sc
Rnd 3: (1 inc, 1 sc) x 2 [6]
Rnd 4: 6 sc
Rnd 5: (1 inc, 2 sc) x 2 [8]
Rnd 6: 8 sc
Rnd 7: (1 inc, 3 sc) x 2 [10]
Rnd 8: 10 sc
Make a sl st and fasten off leaving a long tail to sew it to the head.
CHEEKS (x 2)
With pink
Rnd 1: 8 sc in a MR [8]
Make a sl st to close the round.
Rnd 2: 1 ch, 8 inc [16]
Make a sl st and fasten off leaving a long tail to sew it to the face.
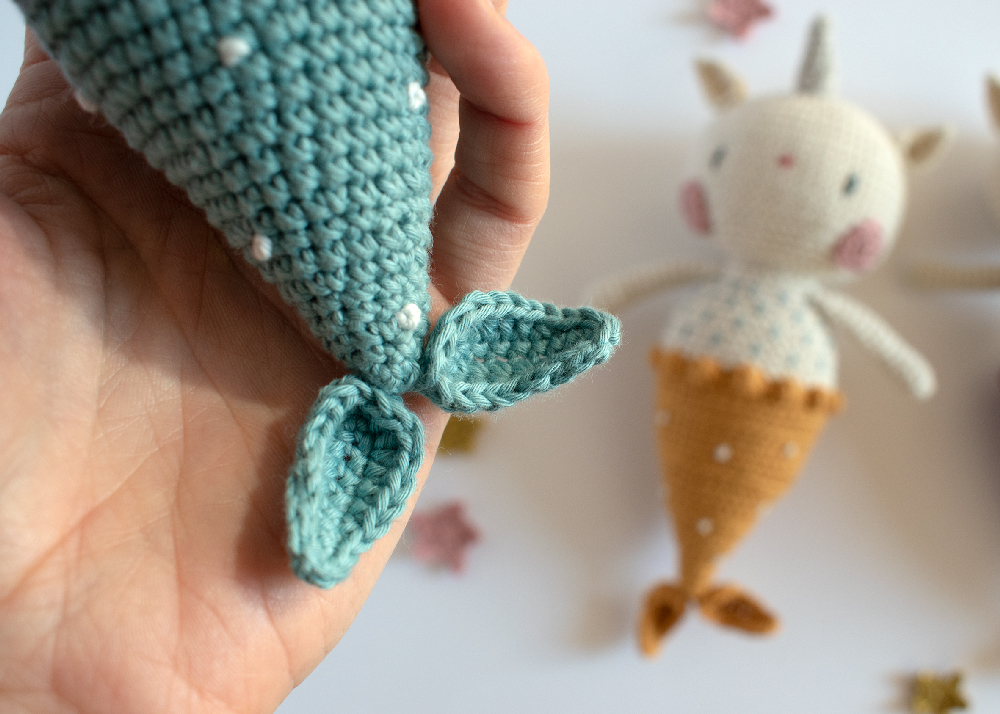
FINS (x 2)
With color A
Ch 9 (leave a long tail at the beginning to sew to the tail). Crochet around the chain. Starting from the 2nd ch from hook:
Rnd 1: 7 sc, 3 sc in last ch. Continue crocheting in the other side: 7 sc [17]
Rnd 2: 3 sl st, 2 sc, 2 hdc, (2 dc in the same st) x 3, 2 hdc, 2 sc, 3 sl st [20]
Fasten off and weave in the end.
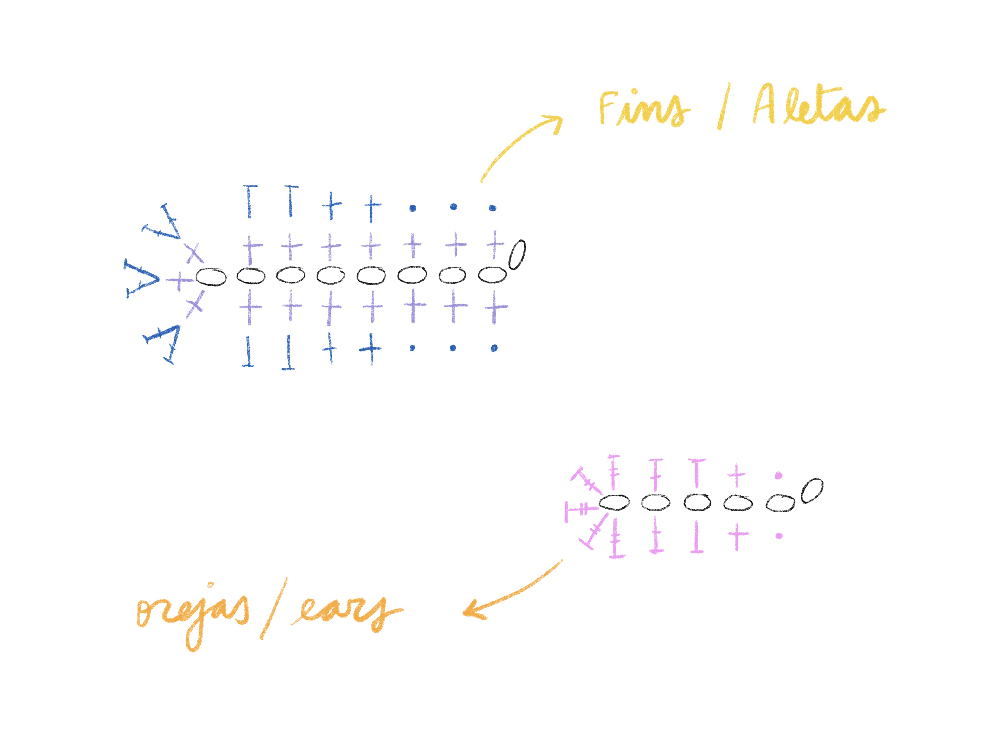
EARS (x 2)
With off-white
Ch 6 (leave a long tail at the beginning to sew to the head). Crochet around the chain. Starting from the 2nd ch from hook:
Rnd 1: 1 sl st, 1 sc, 1 hdc, 1 dc, 5 tc in last ch. Continue crocheting in the other side: 1 dc, 1 hdc, 1 sc, 1 sl st [13]
Make a sl st, fasten off and weave in the end.
ASSEMBLY:
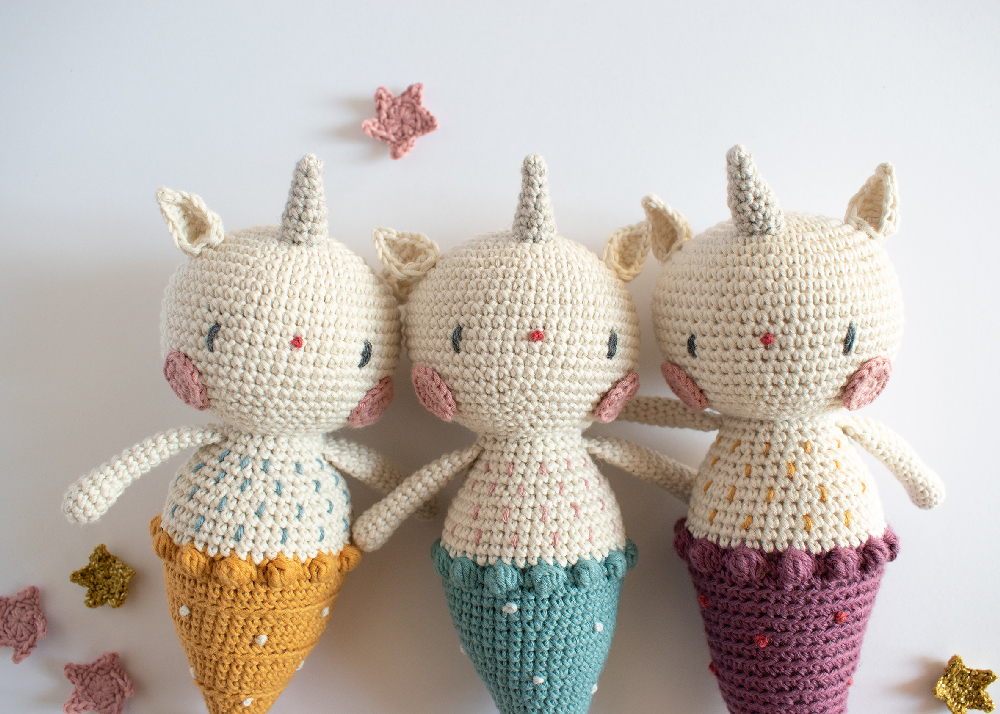
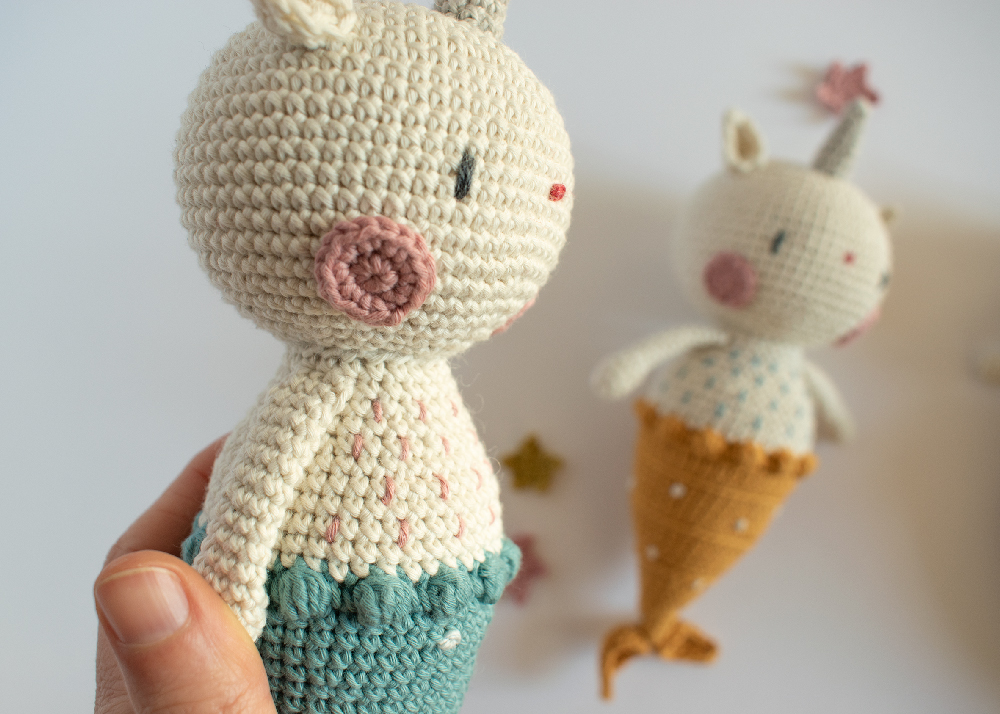
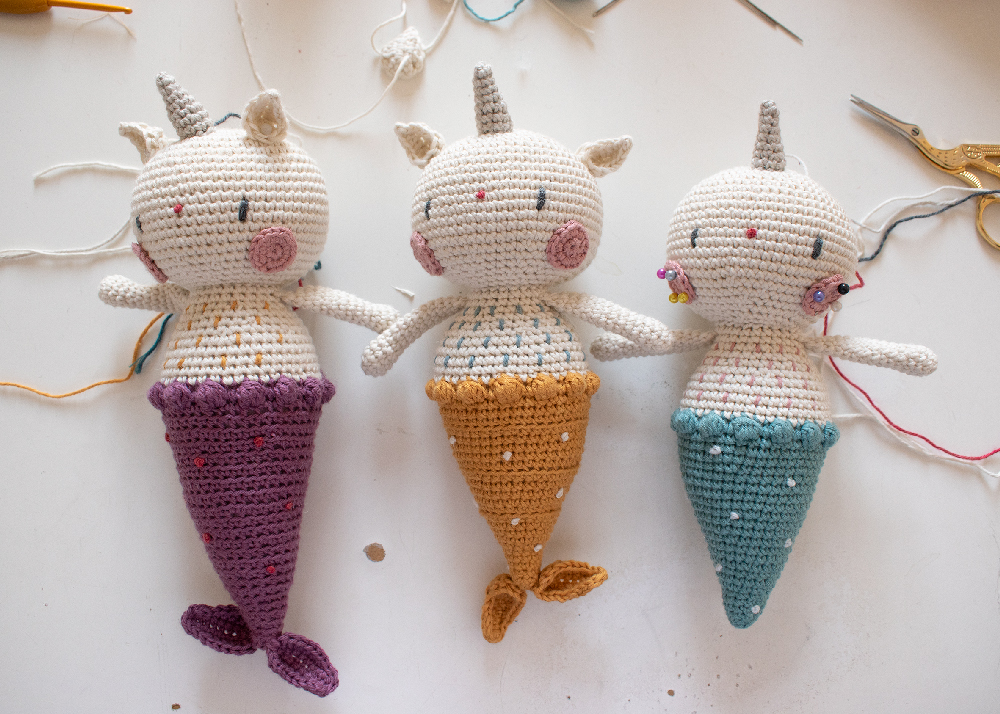
Use the images as a guide. Use pins to hold the pieces in place before sewing.
1- Sew the head to the body (centered). Before finishing sewing, stuff the neck firmly to prevent a floppy head.
2- Sew the horn to the head, centered, between Rnds 3-7 approx.
3- Embroider the nose in the middle of the face, in Rnd 15, with a French knot stitch (use the embroidery needle).
4- Embroider the eyes with 2 straight stitches, between Rnds 14-17, 6 stitches from the nose.
5- Sew the ears to the head. Try various positions, with the help of pins, and sew the ears where you like the most.
6- Sew the fins on the sides of the tail.
7- Sew the arms to the sides of the body, between Rnds 35-36.
8- Decorate the body by embroidering some straight stitches on the chest and some French knot stitches on the tail (optional).
You already have it! Ready to play!
If you like my work, you can support me by inviting me to a coffee 😉 :
THIS IS AN ORIGINAL KURUMI PATTERN.
The pattern is for personal and non-commercial use.
The pattern can´t be reproduced without the author’s permission.
This pattern can´t be sold (you can sell items made from this pattern, as long as they are handmade by you in a limited number and you give credit to me as the designer).
IF YOU HAVE ANY DOUBTS OR SUGGESTIONS (OR IF YOU FIND ANY ERROR IN THE PATTERN) PLEASE WRITE TO:
jacintakurumi@gmail.com
THANK YOU FOR RESPECTING AND VALUING MY WORK!
Greetings and happy crocheting!!!
© 2021 Kurumi, June Mira.
All rights reserved. Any type of reproduction, distribution or sale of this pattern, without the permission of the author, is strictly prohibited.






![MARGARITA LA FLOR [patrón gratis]](https://kurumiweb.net/wp-content/uploads/2019/05/portada-cast-600x400.jpg)
![Амит, добрый кролик [Бесплатный рисунок амигуруми]](https://kurumiweb.net/wp-content/uploads/2019/04/amit_ruso.jpg)
![Amit el conejo amable [patrón gratis]](https://kurumiweb.net/wp-content/uploads/2019/03/patrón.jpg)